We moved into our new house in November. Well, new to us. LOL! Which gives us a lot of time to prepare for the upcoming spring and summer. After many years of asking hubby (Greg) to build me a pool in our backyard; I finally have one in our new house.
Therefore, naturally I began to put some DIY, design ideas into action. Most of my family and friends know how thrifty I am. No shame here.
After discussing it with Greg, I got to work on building our tiki bar for the outside pool area.
The finished Product...
First, I needed pallets.
I
started by browsing Craigslist for free stuff. To my surprise; all of
the free pallets were gone within a few hours after they were posted.
I bought 7 pallets for the job; it only calls for 3; but,
I wanted to get more, just in case. ($5 each)
 |
| i am not savvy enough to turn this picture upright. LOL! |
Sorry about the upside down picture:
I used the above stain and sealer. ($33)
I stained the front completely and the back partially. Just to ensure that I would not run out of stain.
After carefully measuring everything, Greg and I decided that the Tiki Bar should be 8 ft. long. Greg and Michael screwed the pallets together.
We placed the base on rollers, so we could make sure the base does not sit on the ground.
Hopefully, that will work to keep the base from getting wet. (rollers $4)

We purchased an 8x4 piece of plywood for the bar top. ($12)
After the bar top was screwed on.
I practiced with something smaller, prior to taking on the Tiki Bar.
I practiced with something smaller, prior to taking on the Tiki Bar.
Bought a $7 queen size flat sheet (orange) to use as my base to cover the wood. Used the decoupage to glue the sheet to the wooden bar top.
($6) Walmart of course! I purchased 2/32 oz.
($6) Walmart of course! I purchased 2/32 oz.
Used mod podge to glue and cover the plywood with orange material
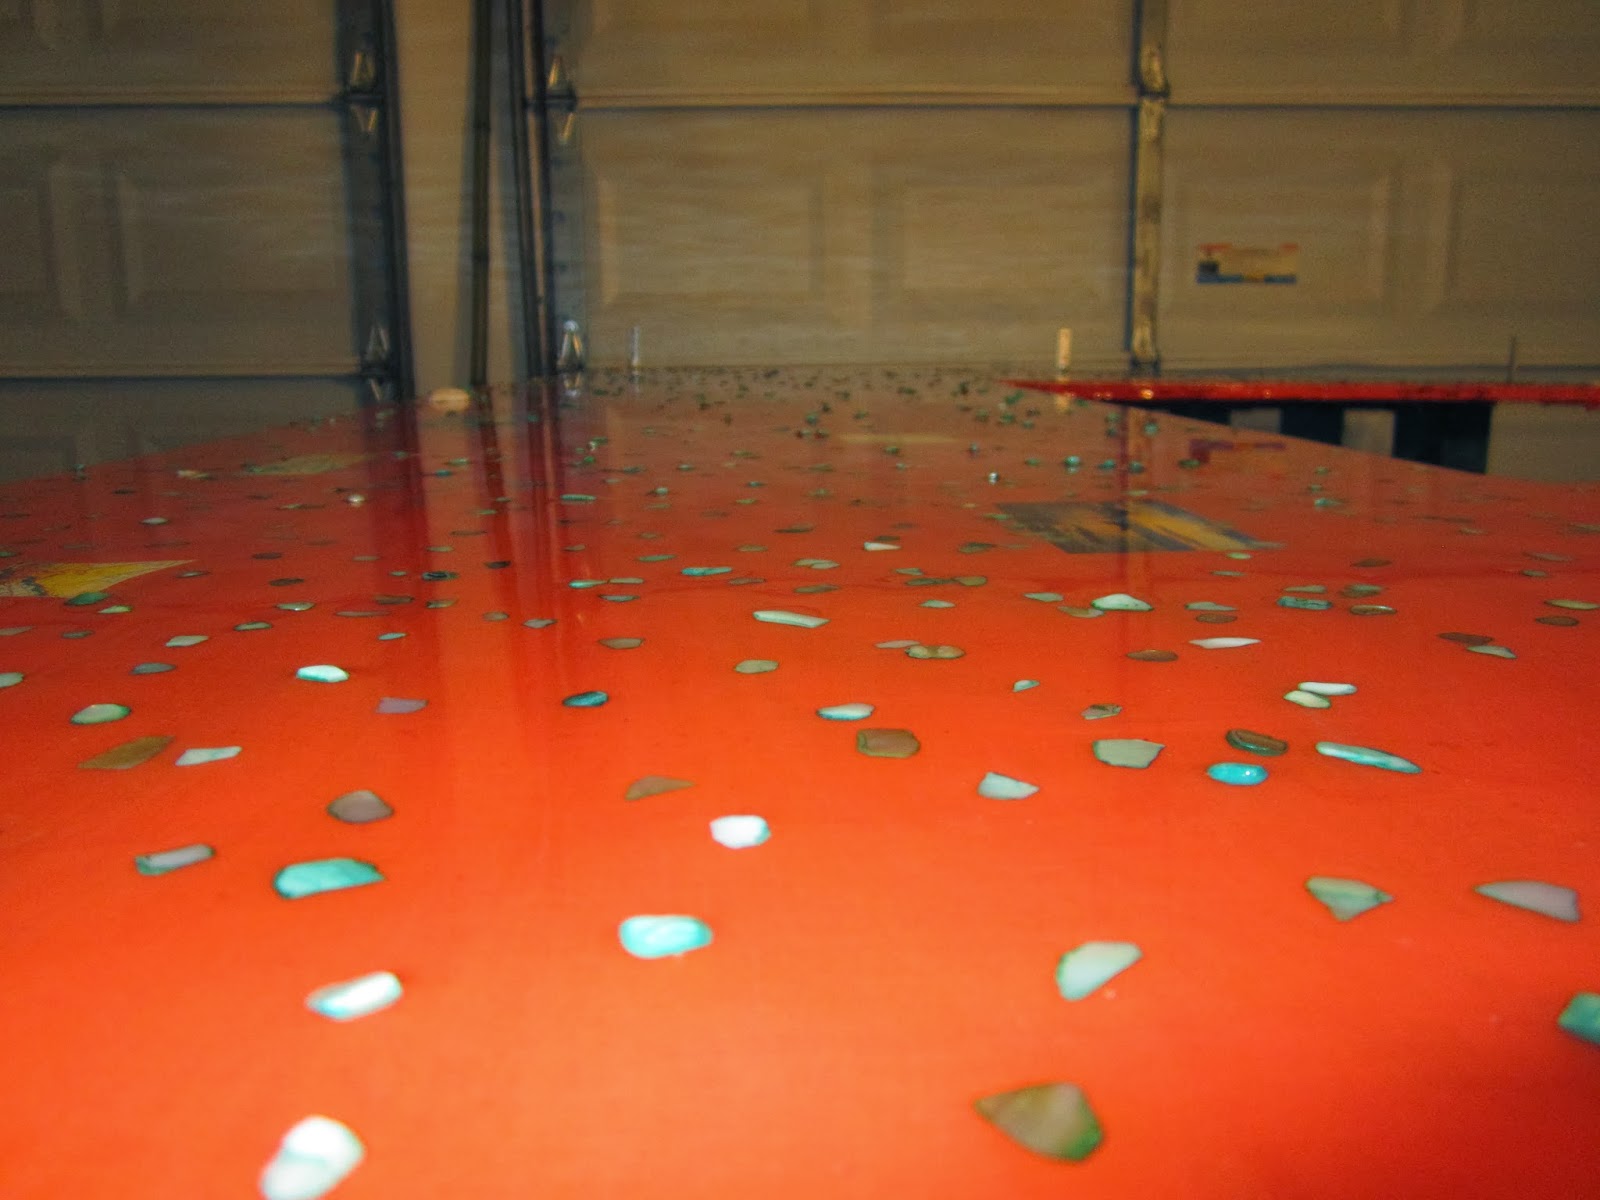
Decorated with crushed seashells (Don't do what I did.)
Wait until you pour your resin on to add the shells. Or, glue all of the shells to the cloth.
My glue dried before they adhered.
Wait until you pour your resin on to add the shells. Or, glue all of the shells to the cloth.
My glue dried before they adhered.
Added a couple of marine life portraits. The white stuff you see around the crushed shells is wet mod podge. It dries clear.
Added a couple of maps indicating places that Greg and I have lived.
I made sure to cover the material and the pictures
with 3 coats of Mod Podge.
The above Enviro Tex Lite Pour on is awesome! Very costly. This was by far the most expensive part of the Tiki Bar. ($32) I had a Michael's coupon for half off. I paid $16 and we needed 7 of these.
Be sure your project is leveled when using any pour on epoxy resins. It will save you a lot of money. The resin spreads over your project and if your item is not leveled the resin will run off the sides.
The brackets will hold the bamboo roof of the Tiki Bar. My husband decided to make it so the roof of the Tiki Bar is removable. That was a great idea because, I was able to pour my resin in a controlled environment (the garage) and, when the weather is bad; we can take the tiki roof off.
Finished product! Whew! If you plan on doing a large area like I did;
I would encourage you to get a blow torch. Because I had to physically blow out all of the bubbles.
The brackets will hold the bamboo roof of the Tiki Bar. My husband decided to make it so the roof of the Tiki Bar is removable. That was a great idea because, I was able to pour my resin in a controlled environment (the garage) and, when the weather is bad; we can take the tiki roof off.
One of the brackets will be used to secure the bar to the fence.
All of the above (9) pictures are after the pour on resin has dried and harden. As you can see; it is crystal clear. Two coats.
Bamboo grows here in Georgia. I am a bamboo lover; therefore, I always notice it while driving around. There are a couple of homeowners that uses it as privacy trees. After the ice storm I noticed that a lot of bamboo had fallen. We politely pulled into the driveway of a stranger and asked if we could have some of the fallen bamboo. The gentleman was very happy to give it away. We used the bamboo to frame the hut/roof of the Tiki Bar. We are going to use the bamboo leaves as thatching for the roof and between the pallet openings. I will post some updated pictures of the tiki roof/bar top when my husband decides to assemble it. Feel free to ask questions. It was a fun family winter project.
If you look close, you can see the bar in the right corner of the pool. As I stated earlier, I will post some updated pictures of the tiki bar when my Greg decides to assemble it the roof of the bar.
Please excuse all and any typos.


